Final Fantasy VIII is the pinnacle of the implementation of Limit Breaks in the storied JRPG franchise.
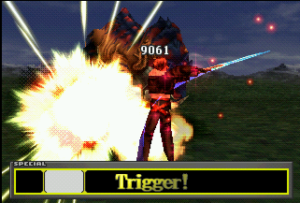
Stressing interactivity and real-time button presses, Limit Breaks ensure the player is adequately stimulated during battle, while simultaneously being the game’s premier damage output modality.
This amazing iteration of the powerful Limit Break mechanic, can become even more useful to those who know how to exploit it properly. Manipulating character turns, HP and casting certain spells all act as easy ways to control access to Limits.
Manipulating said access, however, is not the only available exploit at the player’s disposal; particular character’s Limits can be made nearly unstoppable, with a bit of planning and some fast fingers.
What I am referring to in this case is Rinoa’s Angel Wing and Zell’s so-called “Armageddon Fist,” a loophole in his Duel Limit Break that allows theoretically infinite damage. In this article I will provide all that is needed to get the most out of these to exceptional Limits, as well as a general overview of making Limit Breaks more easily accessible.
Reaching Your Limits: How to Get Limit Breaks Easily
How to use a Limit Break
When a Limit Break is available a “>” will appear next to the Attack command.
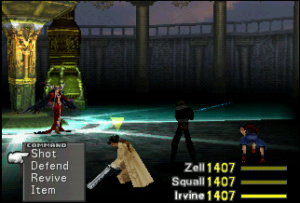
Simply hold right on the D-pad and the command will change to the name of the Limit Break. For example Attack will change to “Duel” for Zell or “Shot” for Irvine.
Low HP
When the player is at approximately 30% of their maximum HP, and it appears Yellow on screen, the chance of a Limit Break appearing increases.
Crisis Level
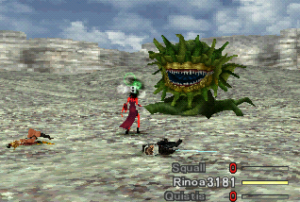
Crisis Level is a hidden stat that helps determine the availability of a Limit Break during battle.
Crisis Level is determined by 3 main factors.
- HP level
- Number of KO’d Party Members
- Negative Status Effects
As mentioned Low HP alone can cause a Limit Break to appear, but luckily the effect is stackable with the other two influencing factors.
Each status ailment increases the chances by a given percentage. Multiple negative status effects lead to MULTIPLE increases in Crisis Level.
Each KO’d party member also increases the chances of a Limit Break, with the second KO yielding twice as much percentage as the first KO’d character.
These factors can easily be optimized by purposely damaging or inflicting status ailments on party members. Silence is probably the least damaging side effect and is my main suggestion for any character that will not be using Magic.
Aura Spell
Speaking of Magic, the Aura spell, when cast on an ally, increases the chances of having a Limit Break tremendously, regardless of HP level.
Removing the requirement of low HP opens up doors and makes using Limit Breaks far less risky.
That being said, the duration of the Aura status buff is determined by Crisis Level. Higher Crisis Level Yields longer Aura status.
The item Aura Stone, has the same effect and can be used on a party member via the Item command in battle.
Turn Skipping
Despite all of the ways to increase the chances of a Limit Break appearing, it is still based on probability. One could have an 80% chance of obtaining a Limit break according to the Crisis Level and still not get a Limit Break on a characters turn.
More turns leads to more opportunities to win the Limit lottery, but waiting for the ATB gauge to fill and performing senseless commands is both boring and potentially wasteful.
Enter the almighty “O” or “Circle” button. Pressing Circle during battle allows the player to skip a character’s turn without decreasing their ATB gauge. This essentially allows saving a turn for later.
Mashing the Circle button continuously until the “ding” that signifies a Limit Break is heard can, in minimal time, make a Limit appear. This is much more efficient than waiting for new turns as the ATB gauge slowly fills up.
Caution must be used however, if Circle is mashed too fast, and the player’s reflexes aren’t up to snuff, a Limit Break can be skipped over. An additional risk to keep in mind, is that turn skipping can be wasteful if the Crisis level is too low; skipping turns too frequently with a low chance of receiving a Limit Break renders the player inactive, while enemies will continue to attack.
I Don’t Wanna Miss a Thing: Zell’s Armageddon Fist
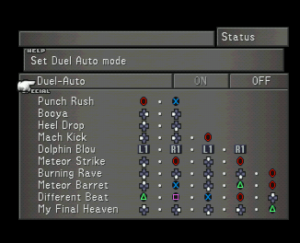
Zell’s Limit Break, Duel, allows the player to enter button combinations of individual attacks as many times as possible within a defined time-limit.
While there are a number of powerful techniques, Zell’s two most basic attacks are the best, wasting the least amount of time during input. The two attacks are:
- “Punch Rush” [button input O,X]
- “Booya” [button inputs Right, Left on the D-Pad].
Which attack appears first, and how much time is allotted for the Limit Break for that matter, is determined by Crisis Level. Higher crisis levels favor starting with Booyah, while lower favor Punch Rush.
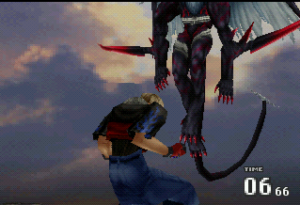
Theoretically it is possible to hit with these two attacks well over 100 times depending in the player’s reflexes and the amount of time given.
In a 12 second Duel, the maximum time awarded, it is possible to do even more if the player is able to make inputs in less than one second, which is definitely achievable even with average reflexes. The overall damage output in such a scenario can be well over 1 million HP with maxed stats.
Two-Winged Angel: Rinoa’s Angel Wing
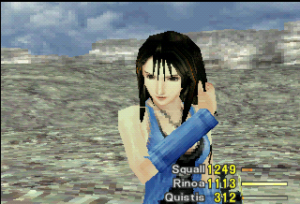
As the game progresses, Rinoa gains access to a second Limit Break, Angel Wing. This Limit Break sends Rinoa into a berserk-like state that increases magic attack 5-fold.
In this state, Rinoa will psuedo-randomly cast magic from her inventory to attack random enemies, but the Magic will NOT be consumed.
There are some rules, however, to Angel Wing’s spell selection worth knowing that are not openly publicized within the game.
Who is targeted?
Random enemies are targeted. In a group of multiple enemies, one will be chosen at random.
Rinoa will not target the party or herself.
Spells Left Out of the Rotation
Rinoa will NEVER use curative or support Magic that boosts the target. For example Curaga, Aura, and Triple will NOT ever be selected.
Again, this is appropriate considering Rinoa will NEVER target the party or herself, ONLY enemies.
Spells Included in the Rotation
All offensive spells, including elemental and non-elemental spells, and status-inflicting spells can be used during Angel Wing status.
For Example Firaga, Meteor, Silence, Demi and Scan are all possibilities.
Particularly note Scan, the proverbial cock-block of all Angel Wing users.
How Spells Are Chosen
Well, this is complicated. It is psuedo-random, but there does seem to be a few patterns agreed on by most Final Fantasy VIII players.
Firstly, Rinoa tends to use status-inflicting spells more often than any other spell class. This can be marginally useful, but since the spell choice is random, the risk of using a status effect an enemy is immune to is omnipresent. Meltdown, the spell that drops enemy vitality (Vit) to zero, is particularly useful, but otherwise I could do without this class of spells.
Next, Rinoa generally uses the best spells the LEAST frequently. For example, Ultima and Flare will be selected less often the Fira.
Interestingly however, she will generally, but not always, choose the higher level spell in a spell family. In other words, Rinoa will cast Firaga more often than Fira.
Other than these examples, there are some arguments for other patterns of her casting, but I cannot reliably reproduce them. Knowing these general patterns can be helpful, but it is better to control the magic inventory as a means to manipulate Rinoa’s choices.
How to Manipulate Angel Wing
Manipulating Angel Wing via the Magic inventory is a simple and effective way to gain control of the randomness and harness the Limit Break’s true potential.
To start, eliminate all status-inflicting spells from the inventory, with the possible exception of Meltdown, which is incredibly useful at debilitating the enemy’s defenses. Aside from this, make sure Scan is NOT in the inventory, it is the bane of an Angel Winger’s existence
Next, eliminate all but the strongest offensive spells. If far enough in the game, limit them to Ultima, Meteor, Holy and Flare. If elemental magic is necessary, use only what is not resisted or absorbed by the enemies or boss in the area.
It is also wise to limit the inventory to one offensive spell to ensure the desired one is chosen every turn.
This becomes particularly useful with Meteor, which is capable of striking an enemy multiple times, thus allowing the player to exceed the 9999 damage cap. With appropriate junctioning, each hit of Meteor can hit for 5000-8000.
In order of importance, the stats that are highest priority for Rinoa and Angel Wing are:
- Magic
- Speed
- HP
Junctioning Supportive and Curative Magic that are not used during Angel Wing is key. These spells will allow for maxing stats without compromising the control of the Limit Break. Spells like Triple and Full-Life are particularly useful for Speed/Magic and HP respectively. The chosen Non-Elemental Magic can also be used in junctioning, since Angel Wing will not consume any of the spells from the inventory.
Final Word
Overall, Limit Breaks, particularly Zell’s and Rinoa’s, are some of the most lethal attacks available in the game. The game’s most difficult enemies, including the near-immortal Omega Weapon, are all made significantly easier with knowledge of the underlying mechanics of Limit Breaks, and related exploits. Enjoy dominating Final Fantasy VIII.

